
Appearance
Bulk uploading records (xlsx)
Import reference data from an Excel workbook. Each worksheet supplies an entity's records, with column names in the first row. Prepare a complete worksheet for each entity you update.
This page covers the file format, the upload flow, and the common pitfalls.
File format
Save the workbook as .xlsx. CSV isn't supported by this importer. Use the worksheet name for the entity name, such as Vendors or Accounts. A workbook can contain several entities on separate worksheets.
The importer finds an entity with that name in the current project, or creates one. The first row supplies column names; subsequent rows supply records. Keep column names consistent with any definitions that reference them.
Convert CSV to a workbook
Open the CSV in Excel or Google Sheets and save it as an Excel workbook. Renaming the file extension does not convert its format.
Preparing the file
For a worksheet named Vendors, use headers such as vendorId, vendorName, vendorAccount, and taxId:
| vendorId  | vendorName       | vendorAccount | taxId       |
|-----------|------------------|---------------|-------------|
| V-100     | Acme Supplies    | 10-1234567    | LT123456789 |
| V-101     | Beta Logistics   | 10-2345678    | LT234567890 |
| V-102     | Gamma Industries | 20-3456789    | LT345678901 |
Header row exactly matches the entity's column names. Data rows fill the columns; empty cells are allowed.
Column name matching
Headers become record keys. Match the names used by your definitions exactly. Before updating an existing entity, compare the workbook headers with its record view and definition configuration.
Extra columns
Columns with a non-empty header are imported. Columns without a header are skipped. Include every column that your definitions need; the importer does not repair definitions when a key is missing or renamed.
Data types
Check the values saved in the workbook, especially identifiers with leading zeros, dates, and numbers used for range matching. Keep identifiers as text where needed. Resolve spreadsheet formula errors before importing; rows containing formula errors are skipped.
The upload flow
- Open Settings → Mapping → Entities & Definitions.
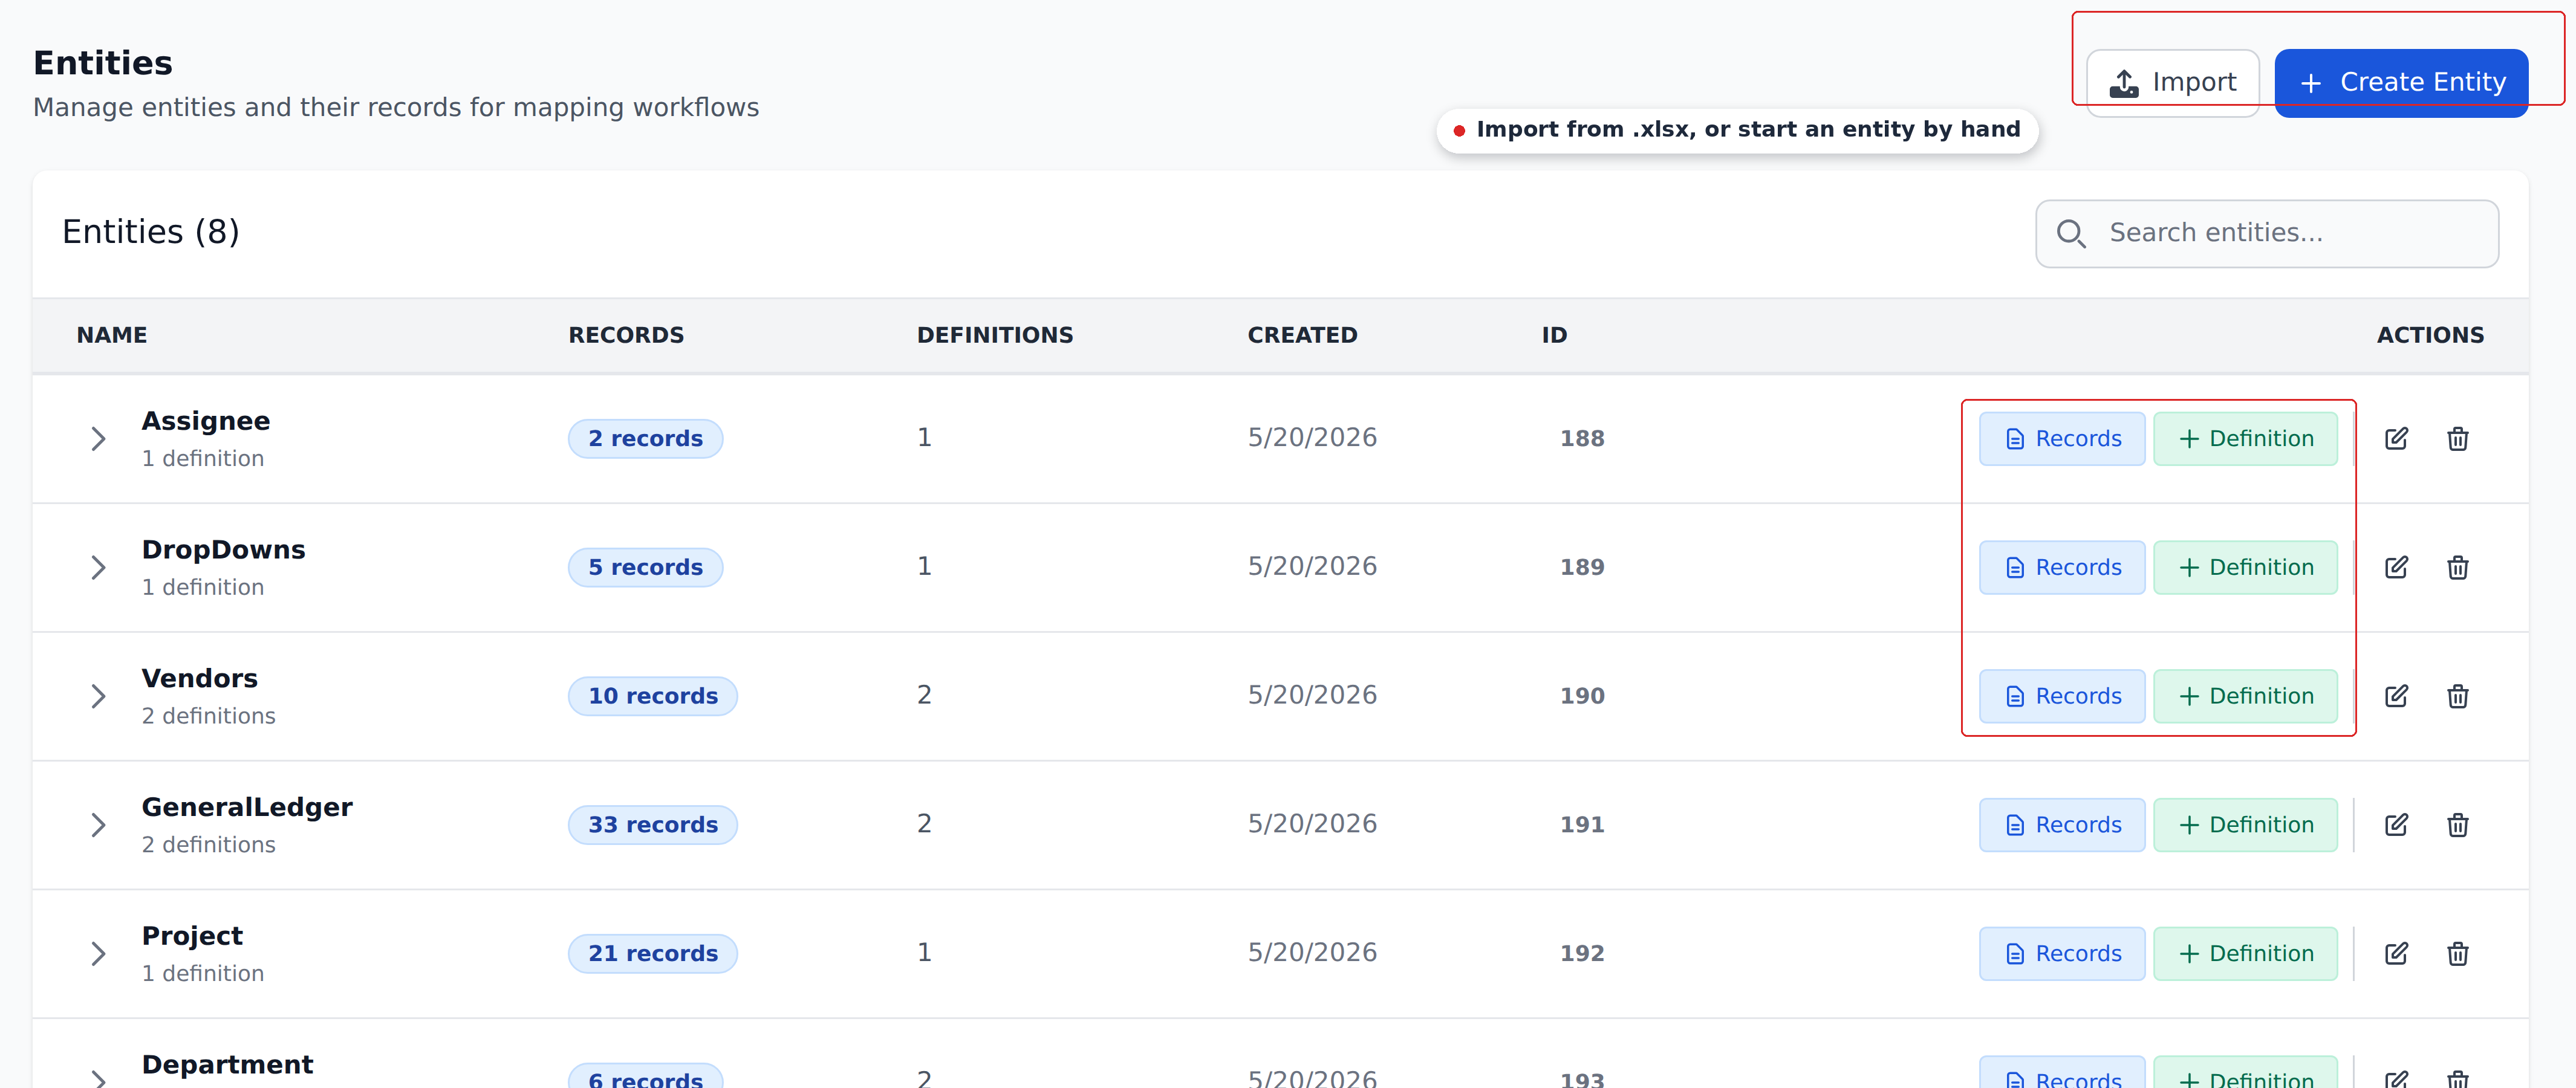
- Click Import on the entity list, next to Create Entity.
- Pick your .xlsx file.
- Confirm.
The system processes the file. For larger files, processing can take seconds to minutes.
Updating existing entities
An import can remove existing records even when Overwrite existing entities is off. In that mode, the importer keeps matching records, adds new or changed rows, and removes records missing from the imported data. Treat each worksheet as the complete dataset for that entity, not as a batch of extra rows.
With Overwrite existing entities on, the importer deletes and recreates that entity's records and clears its definitions' saved default selections. Review those selections afterwards; this is separate from the explicit Level 0 and Level 1 fallback values.
Check an update before applying it to a live project
Export a backup and try the complete workbook in a test project first. Compare row counts and test definitions, including fallbacks. Do not use an empty worksheet to clear an entity.
Validating before upload
Before uploading a large file, sanity-check:
- Header row matches the entity's columns.
- No formula errors or unintended empty rows. Rows skipped by the importer reduce the resulting record count.
- No unintended duplicate lookup keys. When several records match, their order and default selection affect which values are used.
- Correct delimiters and number formatting. Particularly for numeric range columns.
For mission-critical uploads (a vendor master with 1,000+ rows), upload to a test project first and verify a few lookups before pointing the production project at it.
After uploading
Once the upload finishes:
- Verify the row count. Compare with the source data.
- Spot-check a few rows. Open the entity's record view and pick a few rows you know — confirm the values landed in the right columns.
- Test a definition that uses the entity. Run a sample document through a workflow that touches the entity and confirm the lookups fire as expected.
If anything looks off, compare the result with your backup before importing again. Correct the complete worksheet and repeat the test-project checks.
The .xlsx round-trip for updates
For entities that need periodic updates (vendor master changes monthly, GL chart changes quarterly), the typical workflow is to prepare the updated spreadsheet in Excel or Google Sheets — adding new rows, correcting existing rows, removing deprecated rows — then import it via Import.
Keep the complete worksheet in your source system or workbook so that each update includes all the records you intend to retain.
When the API is a better fit
If you update entities frequently from a programmatic source — an ERP nightly sync, a CRM feed — the entity-records API is more ergonomic than the .xlsx round-trip. Recognito exposes GET, POST, PUT, and DELETE on a project's entity records; the API key needs the entity-records scope.
Two things to know before you build on it:
- Updates and deletes match by
search_by, not by ID. They affect every record matching the criteria you send — there's no update-one-by-id path. Use a search key that's guaranteed unique, or you can change more rows than you meant to. - The read endpoint has no pagination. It returns every record in the entity in one response, so it won't scale to very large tables without care.
See the API Reference for the exact request and response shapes. For one-off or occasional loads, the .xlsx upload above is still the simpler path.
What's next
- Managing records — manual edits when bulk upload is overkill.
- Creating entities — the schema you're loading into.
- Definitions overview — what the uploaded data drives.