Appearance
General Settings
Manage your project’s basic settings, email options, engines, and document lock rules.
This guide explains how to open the General Settings page, what each setting does, and how to update or delete a project. These settings help you manage your project name, mailbox, engines, duplicate handling, email classification, and document lock rules.
Open General Settings
- Go to the Dashboard and select Settings from the left-hand menu.
- At the top-left of the page you will see your current project name. If you have multiple projects, you can switch projects using this dropdown.
Project Details
Project details define the identity and core processing behavior of the current project.
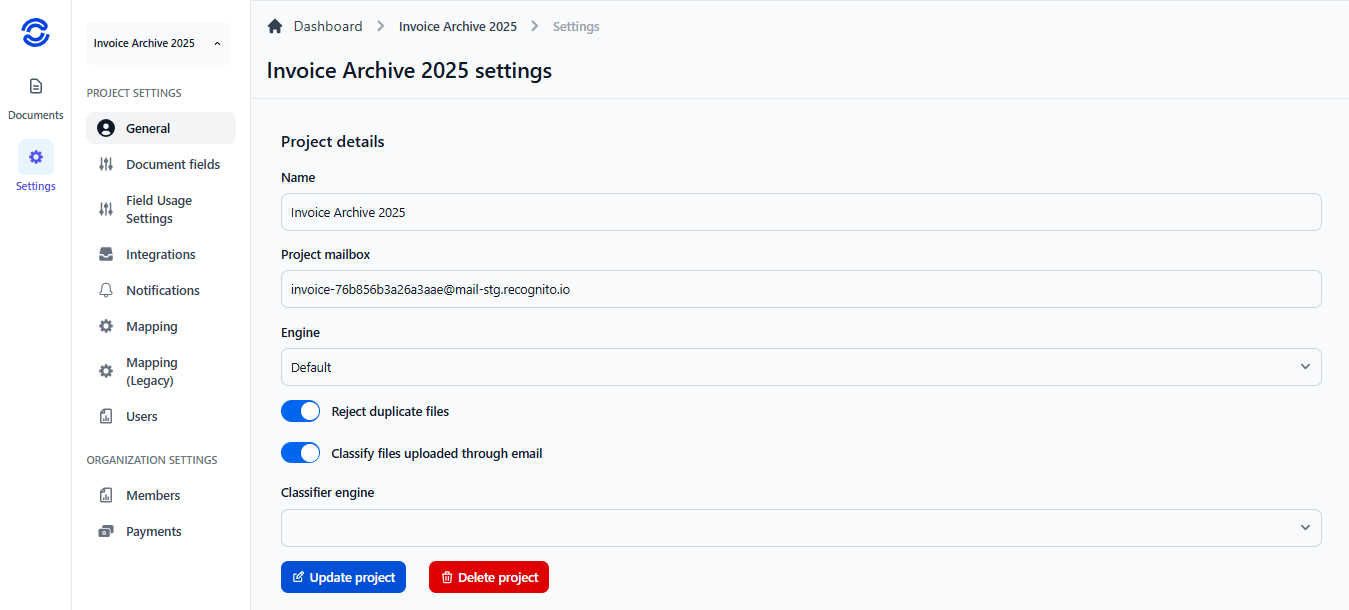
Name: Text field for the project name (e.g., AP Invoices – Prod); changing it does not affect existing documents.
Project Mailbox: Auto-generated email address for document ingestion via email
Engine: Dropdown selecting the extraction engine applied to future uploads
📌 Notes
- For Engine selection, the options available are Default; LTU Invoices v2.0.1; LTU Invoices v1.9; LTU Invoices v1.8; CG Skolu Suderinimo Aktai v1.2.
- Start with Default unless a specialized engine matches your documents. Validate accuracy with a test batch before switching versions. Changing the engine affects only new documents.
Reject duplicate files
When enabled, Recognito prevents re‑uploading an identical file (based on hash / content identity).Classify files uploaded through email Applies document classification automatically to files received via the project mailbox. Enabling reveals the options for Classifier engine.
Project Actions
Update project Saves changes made in Project Details (name, engine, toggles). Use after any adjustment.
Delete project Opens a confirmation modal requiring explicit text input to proceed.
Are you sure?
This action CANNOT be undone. This will permanently delete the all the documents in the project
Please type in the name of the project to confirm.
Document Lock Settings
Document Lock Settings let you automatically stop edits to specific parts of a document once it reaches a chosen lifecycle status. This prevents accidental tampering after review or export and protects data integrity.
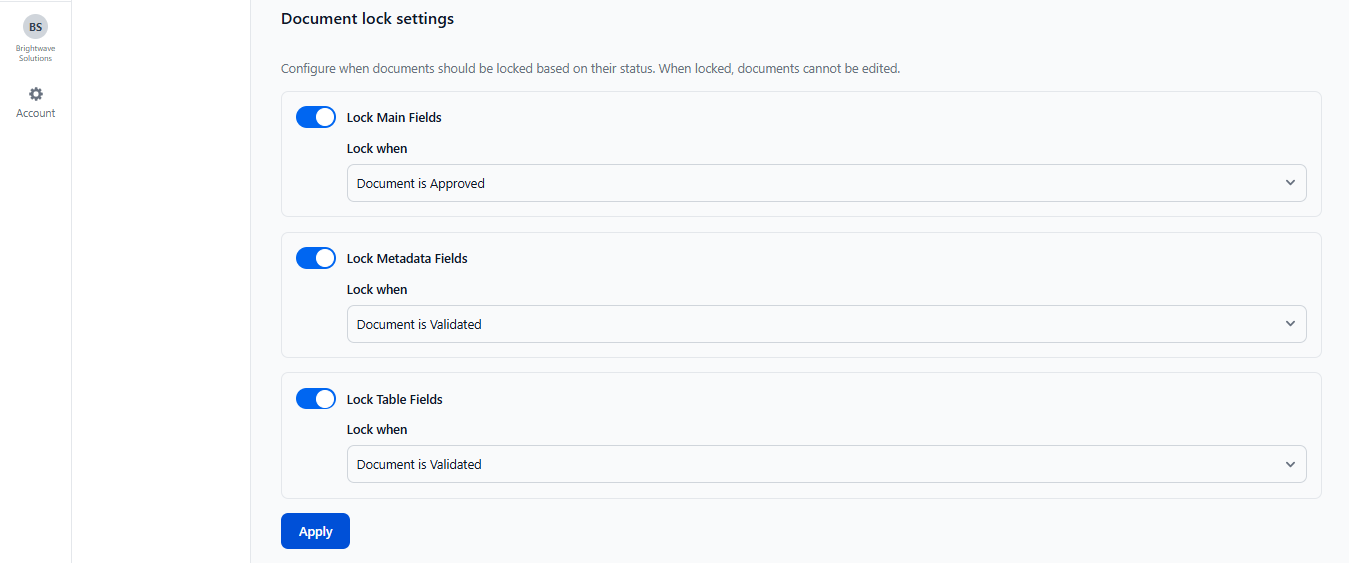
What You Can Lock
- Lock Main Fields: Stops edits to core extracted values (e.g., invoice number, totals) after the trigger status.
- Lock Metadata Fields: Prevents changes to supplemental metadata you (or automation) add (e.g., tags, internal notes).
- Lock Table Fields: Freezes detected line‑item / table row content so amounts or item details cannot be altered.
Each option has its own toggle. Turning a toggle on reveals a dropdown of available trigger statuses.
📌 Notes
The same trigger list appears for each lock type:
- Approved: Lock once a document passes the approval stage; ideal for finalized reviewed data.
- Validated: Lock after formal validation or QA confirmation; ensures checked values stay unchanged.
- Rejected: Lock to preserve rejection reasons and evidence; prevents accidental overwrite while under review.
- Exported: Lock after exporting so the exported dataset remains consistent with the locked state.
Saving Lock Rules
- Configure desired toggles and select a trigger for each enabled lock type.
- Click Apply to save.